This post may contain affiliate links. Please read our disclosure policy.
You’ve never seen a sandwich this pretty! A Japanese Fruit Sando is so beautifully light, sweet, and fruity, it’s the perfect lunchtime treat or tea party indulgence. Use any fruit you like!

A Beautiful, Easy Fruit Sando Recipe!
Have you ever heard of a fruit sando, also known as a Japanese fruit sandwich? These colorful sandwiches are made with snowy-white mounds of whipped cream, soft white sandwich bread, and bite-sized pieces of fresh fruit. If you cut them, you’ll see the gorgeous sliced fruit against the background of sweetened whipped cream, making them a feast for the eyes as well as the tummy.
A fruit sando makes a sweet, unique lunchbox item, or a beautiful dish to serve at a picnic, baby shower, bridal shower, or tea party. You will find many reasons to whip these up, and the best part? It’s incredibly easy to do. If you can make a PB&J, you can make this!
This Recipe Is…
- Light. While it’s definitely on the sweet side, this fruity sandwich is also airy and light, with fresh fruit being the star of the show.
- Simple. Don’t let the showstopping appearance here fool you – fruit sandos are easy to make.
- Cute: Arrange your favorite fruits in any pattern you like, for a lovely presentation.
- Make-Ahead Friendly: Yes, that’s right! As long as you use fruit that’s not too wet or soggy, you can make these a day in advance, and keep them wrapped in plastic wrap in your fridge.

What Is a Fruit Sando Made Of?
- Bread: White sandwich bread, with the crusts trimmed off.
- Heavy Whipping Cream: For making the whipped cream filling.
- Sugar: You will want granulated sugar or caster sugar for sweetening the whipped cream.
- Vanilla: I like my whipped cream with a hint of vanilla, but you could leave this out if you wish.
- Fruit: Assorted fruit, such as strawberries, kiwis, grapes, and mandarin oranges.

How to Make a Fruit Sando
Making a fruit sando is so easy! You just layer the ingredients, wrap, and chill. Chilling the sandwiches with something heavy on top helps keep them perfectly even and gorgeous.
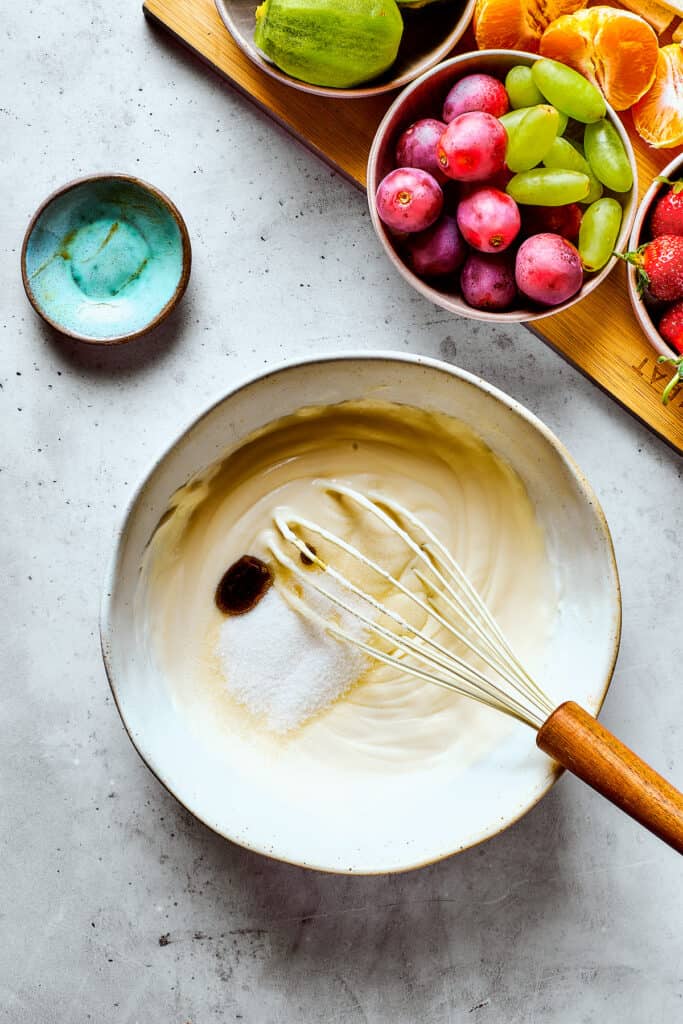
- Prep the Bread and Make the Whipped Cream. Trim the crusts off the bread using a sharp knife, like a bread knife. You want clean, straight edges. Then whip the cream, sugar, and vanilla until light and fluffy.
- Spread Cream on the Sandwich Bread. Lay out the bread slices, and spread a thin layer of cream on each one.
- Add Fruit. Arrange the fruit on the bread, remembering that you will slice on the diagonal. You want to slice right through a line of fruit so that it shows the inside of the fruits. 👇


- Add Whipped Cream. Spoon the whipped cream over the fruit, pressing it down so that it surrounds all of the pieces and covers them completely.
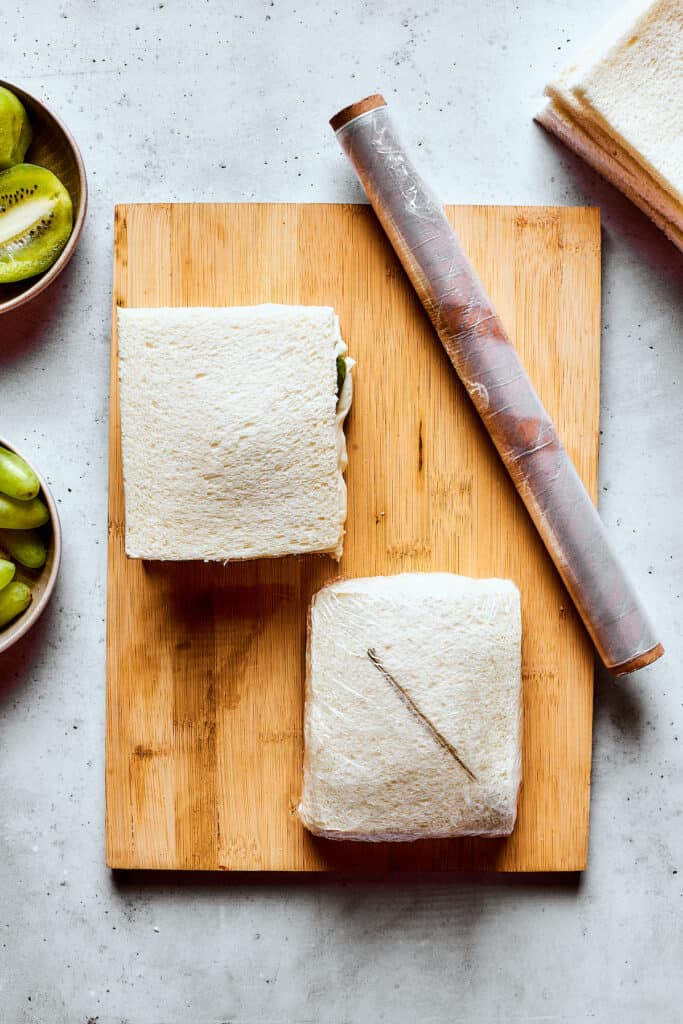
- Top and Wrap. Top the sandwiches with the remaining slices of bread, and then wrap each one carefully in plastic wrap. You can use a food-safe marker to mark the wrap where you plan to cut the sandwich, so you don’t forget.
- Press and Chill. Place the wrapped sandwiches on a tray. Then place a plate or cookie sheet on top of the sandwiches, followed by a weight (like a couple of soup cans, bags of beans, or coffee mugs). This will help press them evenly. Chill for at least one hour.
- Cut and Serve. When you’re ready to serve, unwrap the sandwiches and cut them as planned. Place on a platter, and enjoy!


Tips for Success
It is super simple to make this little dessert, but there are a few tips you should keep in mind as you go. Here’s the scoop:
- Timing: Keep in mind that you will need enough time to whip the cream, prep the fruit, arrange the patterns, and chill the sandwiches. I like to budget more time than I think I’ll need for this, so I don’t feel rushed.
- Whipping the Cream: It is important to whip the cream to stiff, fluffy peaks (in other words, the cream holds its shape when you lift the beaters out, and doesn’t sink back down). If you under-whip, the sandwiches will be soggy. If you over-whip, you will end up with grains of butter instead of whipped cream!
- Make-Ahead: You need to chill the sandwiches for at least an hour to firm up. You can actually chill them for up to two days if you prefer – but just be sure to use firm, un-mushy fruit that will not become watery or soft.
- Cutting: I cut my sandwiches on the diagonal, but you can cut the however you like: in half, into squares, or into small triangles. You can even serve the sandwiches whole.

Serving Suggestions
While fruit sandos are definitely in dessert territory, they can also make a light, creamy, sweet side for lunch or brunch. If you go that route, try pairing your fruit sando with one of these savory mains or sides:
- Pasta Salad: Any cold pasta salad would be perfect with fresh fruit sando. I especially love this mouthwatering Creamy Shrimp Pasta Salad – it’s summery, light, and filling, all at once.
- Bacon: Crisp, meaty bacon is always a hit, so if you’re doing brunch, definitely add this to the menu. My Crispy Oven Baked Bacon method takes all the hassle out of making it.
- Eggs: Eggs are a staple at my house, and we like them every way you can serve them! But if you really want to make mouths water, make a batch of Classic Deviled Eggs. They are all kinds of awesome, my friends.

Storing Instructions
- As mentioned, you can store a fruit sando wrapped in plastic wrap right in your fridge, for anywhere from one hour to two days. If you’re going for longer storage, be sure to use firm, un-watery fruit that won’t get discolored or soggy. Berries are great for this, especially whole, un-cut berries. Do not freeze a fruit sando, or it will become damp and watery.

Fruit Sando
Ingredients
- 8 slices white bread,, crusts trimmed off
- 1½ cups heavy cream
- 2 tablespoons granulated sugar
- 1 teaspoon pure vanilla extract
- assorted fruits, for serving,, such as strawberries, kiwi, grapes, and mandarins
Instructions
- Use a sharp knife to trim off the crusts of the sandwiches, creating clean edges.
- In a mixing bowl, whip the heavy cream using an electric mixer on medium speed until it thickens. Add the sugar and vanilla extract, then continue whipping until stiff peaks form. Set aside.
- Lay out 8 slices of bread on a clean work surface and spread a thin layer of heavy cream on them.
- Arrange a layer of fruits on top, covering them evenly. You can mix and match different fruits according to your preference.
- Take the whipped cream mixture and spoon it over the fruit layer, spreading it evenly to cover the entire surface.
- Place the remaining four slices of bread on top of the cream layer, pressing down gently.
- Wrap firmly with plastic wrap and put the fruit sandwiches on a plate or sheet pan.
- Make sure to mark the direction of the diagonal fruit line, as this will guide you when cutting the sandwich later.
- Place another plate or sheet pan on top of the sandwiches, and place something heavy and firm on top to press them evenly. Allow the sandwiches to rest in the refrigerator for at least an hour.
- Cut the sandwiches into desired shapes, such as triangles or rectangles. You can also leave them as whole sandwiches if you prefer.
- Serve the Fruit Sando immediately, or refrigerate for a few hours to allow the flavors to meld together.
Notes
- Timing: Keep in mind that you will need enough time to whip the cream, prep the fruit, arrange the patterns, and chill the sandwiches. I like to budget more time than I think I’ll need for this, so I don’t feel rushed.
- Whipping the Cream: It is important to whip the cream to stiff, fluffy peaks (in other words, the cream holds its shape when you lift the beaters out, and doesn’t sink back down). If you under-whip, the sandwiches will be soggy. If you over-whip, you will end up with grains of butter instead of whipped cream!
- Make-Ahead: You need to chill the sandwiches for at least an hour to firm up. You can actually chill them for up to two days, if you prefer – but just be sure to use firm, un-mushy fruit that will not become watery or soft.
- Cutting: I cut my sandwiches on the diagonal, but you can cut the however you like: in half, into squares, or into small triangles. You can even serve the sandwiches whole.
Nutrition
Nutritional info is an estimate and provided as courtesy. Values may vary according to the ingredients and tools used. Please use your preferred nutritional calculator for more detailed info.


