Candy Cane Cookies

Dec 07, 2020, Updated Nov 15, 2026
This post may contain affiliate links. Please read our disclosure policy.

These soft, buttery Candy Cane Cookies are just as fun to make as they are to eat! Peppermint sugar cookie dough gets twisted into little red-and-white candy canes, ready to share a cookie platter with melted snowman cookies and Christmas cake mix cookies.

Easy Candy Cane Cookies
I love a Christmas cookie that looks this festive without making me break out the piping bags! These candy cane cookies are soft and buttery, with vanilla and mint mixed right into the sugar cookie dough. You’ll tint half the dough red, twist the two colors together, and bend the tops into little candy canes. The shaping takes a little patience, but seeing a whole tray of them ready for the oven is pretty darn satisfying.
Add my no bake haystack cookies and stained glass cookies to the mix, and you’ve got a Christmas cookie tray worth showing off!
Why I Love These Christmas Cookies
- Classic sugar cookies with a minty twist. You get that sweet, buttery sugar cookie flavor with a little mint to make it feel like Christmas.
- The decorating happens before baking. Those red-and-white twists do all the work. Once the cookies bake and cool, they’re ready for the cookie tray.
- A little holiday baking project. Put on some Christmas music and get the kids involved in rolling and shaping. A few crooked candy canes belong in every batch!

Recipe Ingredients
- Butter and Shortening: You’ll use equal amounts of both. Butter adds flavor, while shortening helps the cookies hold their shape. Both should be at room temperature.
- Powdered Sugar: Sweetens the cookies and gives them a tender texture. It blends smoothly into the dough, too.
- Egg: Helps bind the dough together. Bring it to room temperature so it mixes easily with the butter and shortening.
- Vanilla and Peppermint Extracts: Vanilla adds warmth, and peppermint gives these cookies their candy cane flavor. Measure the peppermint carefully—a little goes a long way!
- All-Purpose Flour: Spoon it into a measuring cup and level it off to avoid adding too much.
- Red Food Coloring: Color half the dough red for those classic candy cane stripes.
How to Make Candy Cane Cookies
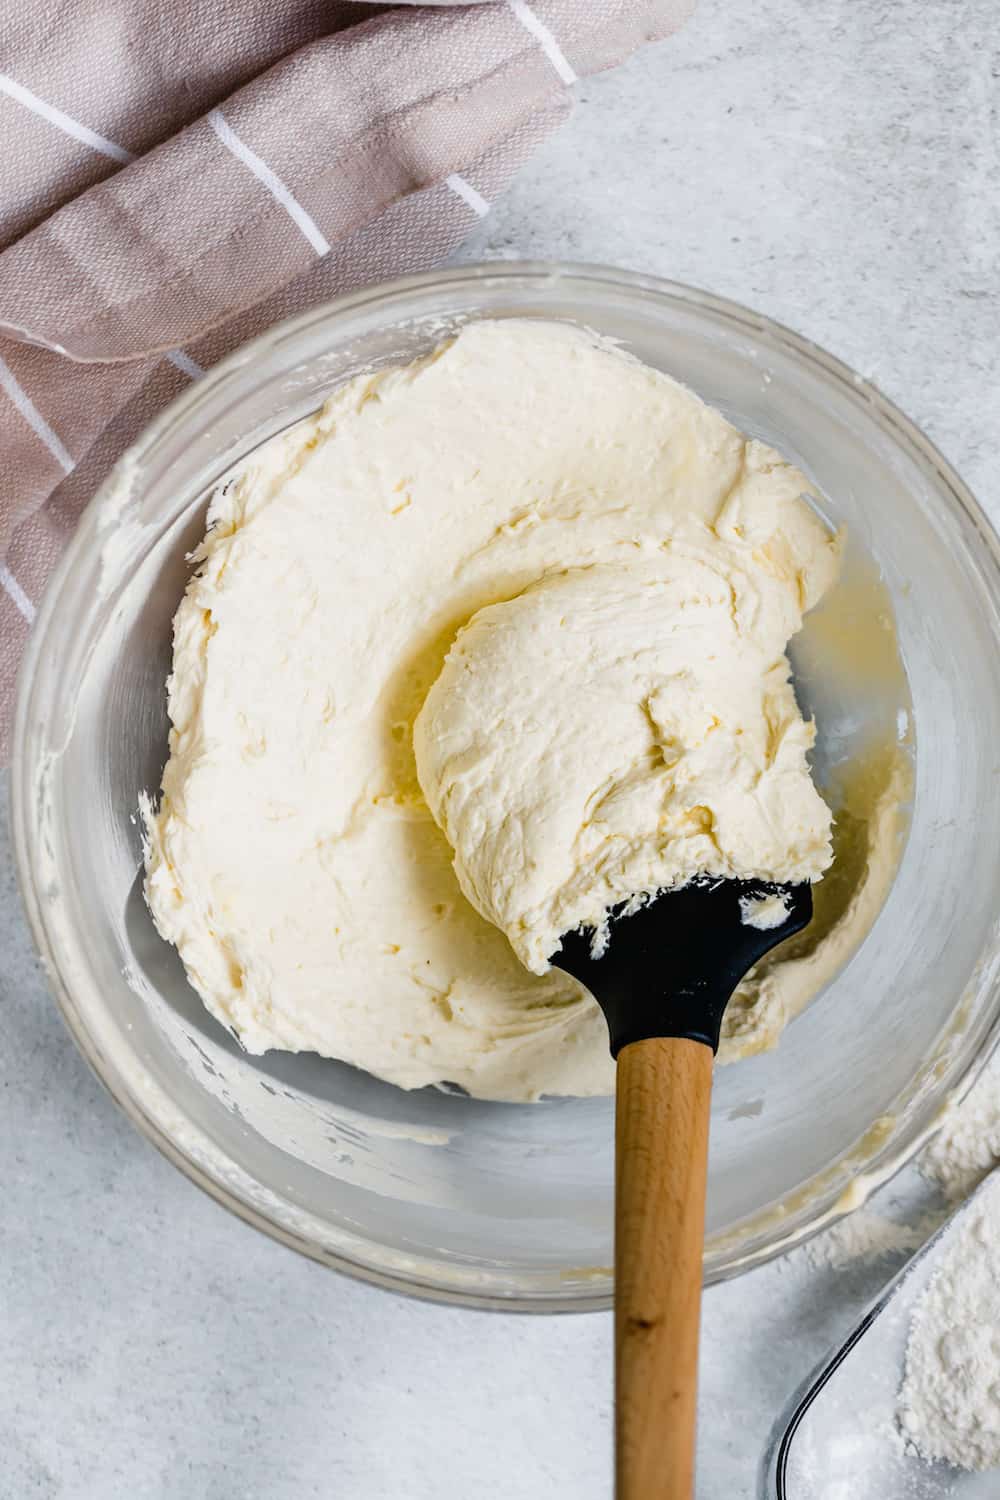



- Cream the butter, shortening, and sugar: In a mixing bowl, beat together the butter, shortening and sugar with an electric mixer until light and fluffy.
- Add the wet ingredients: Scrape down the sides of the bowl, and then add the egg, vanilla and peppermint. Mix together well.
- Add the dry ingredients: Next, mix in the flour and salt on a low speed, until just combined.
- Dye half the dough red: Divide the dough in half and place each half into two separate bowls. Add the food coloring to one of the bowls and mix together well. (You can add 1/4-teaspoon extra food coloring, if you prefer a brighter shade!) Form both pieces of dough into 1-inch thick disks and refrigerate for at least an hour.
- Shape the cookies: Unwrap the disks of dough and take a 2-tablespoon piece of dough from each. Roll each piece of dough into a thick, 6-inch-long rope. Pinch the red and the white ropes together at one end and gently twist to create a red and white spiral rope. Bend the top of the twisted rope to form a candy cane shape, and transfer to a baking sheet lined with parchment paper.
- Chill, then bake: Refrigerate the shaped cookies for about 20 minutes before baking them. Then, bake at 375°F for 10 to 12 minutes. Allow the cookies to cool on the baking sheet for 10 minutes before transferring them to a wire cooling rack.

Make the Dough In Advance
- Follow the recipe up to the point of chilling the dough in the refrigerator. Make sure to wrap the disks well in plastic wrap. From there, you can store the wrapped disks in the refrigerator for up to 3 days before rolling and baking them.
Recipe Tips
- Don’t skip the shortening: You might be tempted to use all butter for this recipe, but the shortening’s high melting point allows the cookies to keep their shape and height. Butter alone would melt faster and cause the cookies to spread.
- Make sure that the butter, the shortening, and the egg are room temperature.
- Try other flavors: Peppermint is a good starting point with these cookie-canes! You could use spearmint flavoring and green food coloring, rum flavoring and a bit of yellow or orange food coloring, or just experiment with flavors and colors that sound good to you!
- Make a wreath: You can also make these delicious cookies into other shapes. I like making twisted green and red wreaths with glitter or pearl sprinkles!

How to Freeze Cookies
- Freeze the baked cookies. Let the cookies cool completely, then wrap each one in Saran wrap before placing them in a freezer-safe bag or container for up to 1 month. When you’re ready to serve the cookies, just let them thaw out on the counter or in the fridge.
- Freeze the cookie dough before baking. Assemble the raw candy cane twists, then freeze the shaped cookie dough on a baking sheet in a single layer. Once the cookies have hardened, wrap each one in plastic wrap and place it in a freezer-safe container.
- Thaw, bake, then serve. Thaw the cookie dough overnight in the fridge, then follow the recipe for baking the cookies. You may need to add a minute or two to the baking time, depending on how cold your dough is and how much it has thawed before baking.

Candy Cane Cookies
Ingredients
- ½ cup unsalted butter, room temperature
- ½ cup shortening, room temperature
- 1½ cups powdered sugar
- 1 large egg
- 2 teaspoons vanilla extract
- 1 teaspoon peppermint extract
- 3 cups all-purpose flour
- 1 pinch salt
- ½ teaspoon red food coloring
Instructions
- Mix the butter, shortening, and sugar. In a mixing bowl, beat the butter, shortening, and sugar together with an electric mixer until light and fluffy, about 3 minutes.
- Add the egg and extracts. Scrape down the sides of the bowl and add the egg, vanilla extract, and peppermint extract. Continue to mix until well incorporated.
- Mix in the dry ingredients. Add the flour and salt, and mix together on low speed until just combined.
- Divide the cookie dough. Remove the cookie dough from the mixing bowl and divide the dough in half; place each half into its own bowl.
- Color the dough. Add red food coloring to one bowl and mix until well combined. You can add extra food coloring if you prefer a brighter shade.
- Chill the cookie dough. Form both pieces of dough into 1-inch-thick disks and refrigerate for at least an hour.
- Prep for baking. When ready to bake, preheat the oven to 375˚F and line a baking sheet with parchment paper.
- Shape the candy cane cookies. Unwrap the disks of dough and pinch off a 2-tablespoon piece of dough from each disk. Roll each piece of dough into a thick, 6-inch-long rope. Pinch the red and white ropes together at the top, then gently twist and braid them. Form a bend at the top of the twisted rope to make a candy cane shape; then, transfer it to the prepared baking sheet. Repeat this process with the remaining dough.
- Chill the shaped cookies. Refrigerate the cookies for 20 minutes before baking.
- Bake. Transfer the baking sheet to the oven and bake the cookies for 10 to 12 minutes.
- Cool, then serve. Remove the candy cane cookies from the oven and allow the cookies to cool on the baking sheet for 10 minutes before transferring them to a wire rack to completely cool before serving.
Equipment
Notes
Nutrition
Nutritional info is an estimate and provided as courtesy. Values may vary according to the ingredients and tools used. Please use your preferred nutritional calculator for more detailed info.











Thanks for the tip about using shortening otherwise I probably would’ve used butter. These look so cute. Can’t wait to make them.
I hope you enjoy them! Thank YOU! 🙂
My kids are going to love this recipe! So pretty and festive! I’m so excited!
This is so perfect! Kids will surely enjoy making ad eating this!
Thank YOU! I hope you and your kids enjoy them! 🙂
How cute are these cookies! It will be a lot of fun making them!
I hope you enjoy them! Thank YOU! 🙂
These cookies are the cutest! Such a festive addition to any cookie plate!
Thank you so much! I hope you enjoy them! 🙂
I have always wanted to make these! Saving this recipe for our Christmas cookies!
I hope you enjoy them! Thank you so much! 🙂